


30.11.2022
Dreadsail Reef Armor Sets – How are they good?
Dreadsail Reef is the trial added in the High Isles chapter and it has lots of interesting things inside for you to collect. It makes perfect sense that pirates' base has lots of swag in treasure chests. And we're here to lay our hands on them and see what's inside! This blog post will deal with the armor sets that you can obtain in the DSR trial. We'll see what they look like and how they are good. Basically, there are 4 sets: 1 heavy set, 1 medium, and 2 light ones – one for DPS casters, one for support champions. These sets are:
- Pearelscent Ward (heavy)
- Coral Riptide (medium)
- Whorl of the Depths (light DPS)
- Pullager's Profit (light support)
All of them also have a perfected version which is exclusive to the veteran difficulty (vDSR). What makes them different is the quality of items (purple instead of blue) and stats. So with that said, now let's take a closer look at each of the sets one by one.
Pearelscent Ward (Heavy)
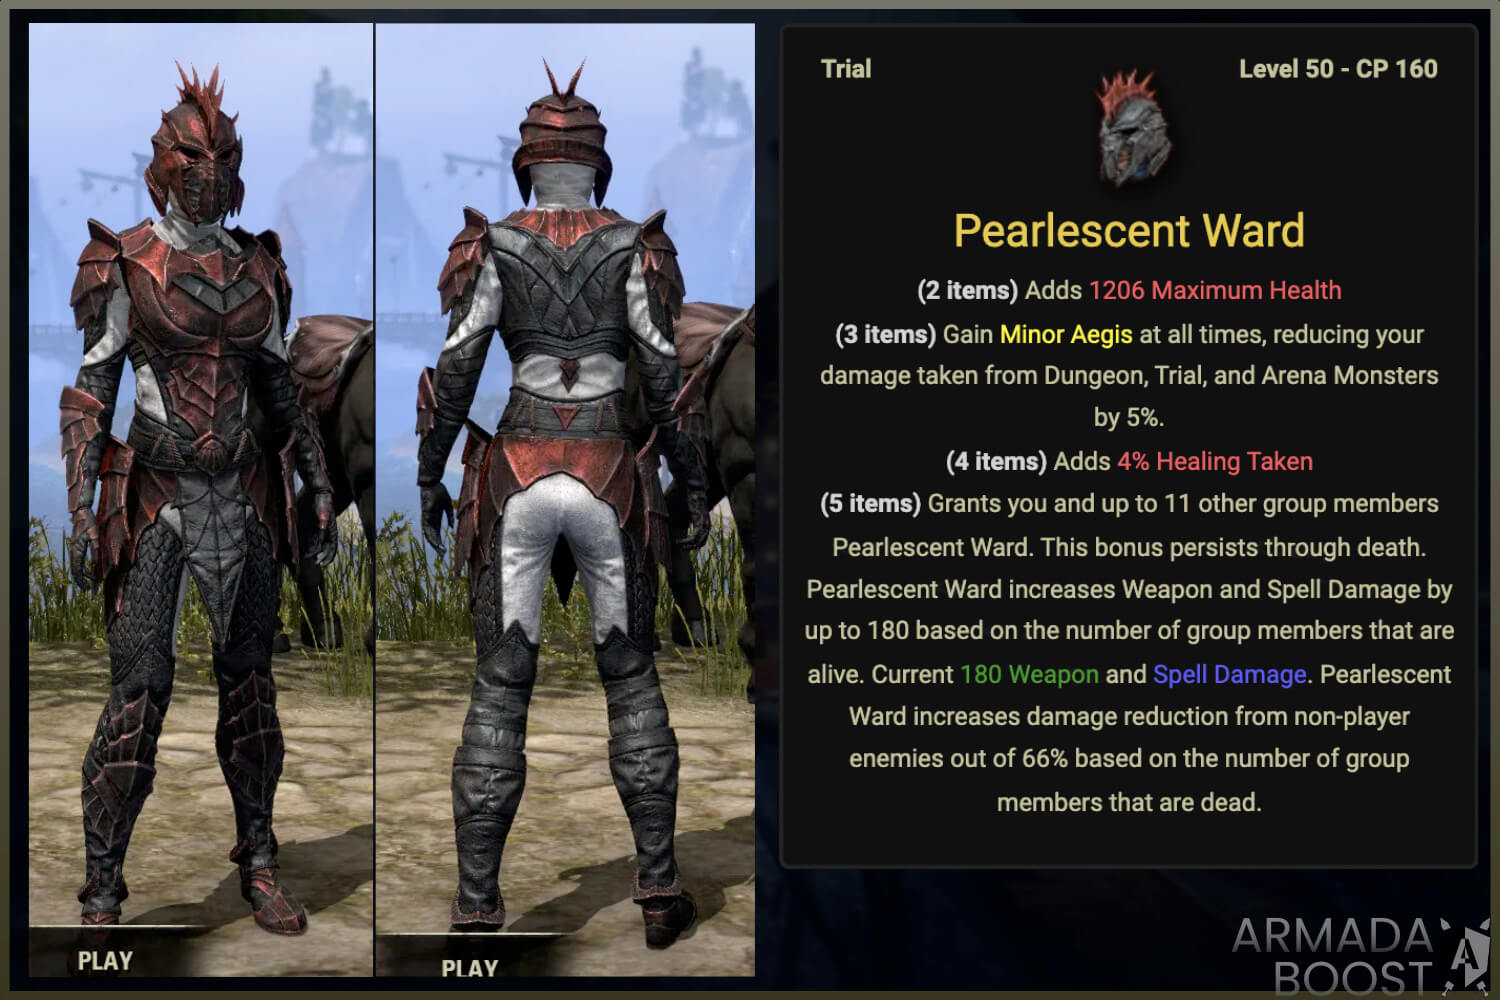
Pearlescent Ward is best suiting for tanks. It makes that explicit with its bonuses. The 2-piece bonus, for example, increases your Maximum Health by up to 1'206 – the amount of the health increase depends on how lucky you are with the drop. The 3-item bonus reduces incoming damage from hostile NPCs in PvE activities by 5% (AKA the Minor Aegis buff). The 4-piece effect improves healing taken by you by 4%. The perfected version of the set also adds more maximum health to you for collecting 5 items. So what we already have with the first 3 bonuses is this: you get more HP, you suffer less damage while tanking, and all the incoming healing is more effective for you. Who else could benefit from it but a pure tank in a trial or dungeon? And we're not even over with this set's special effects.
Here's the final bonus – ultimate – which is given for collecting 5 items. With it you and your team mates (up to 11 of them, which is a trial group) get the buff "Pearlescent Ward". It has 2 sides: the offensive and defensive ones. The offensive part of it works like this: the more members of the team are alive, the more damage increase you all get. If someone dies, the damage increase for all the members becomes smaller. The defensive part of it works, well, the other way: the more members of the raid are dead, the less damage you take from hostile NPCs (up to 66% reduction). So if one of your teammates goes down, you all get a defence bonus and the incoming damage for you all gets smaller. The best part is that you don't even have to do anything to activate it – the buff is passive and you'll enjoy its benefits throughout your boss fights without any extra actions on your side. It won't be exactly smart to tell some of your teammates to die on purpose to get the defensive bonus of the Pearlescent Ward, but it will definitely make you less unhappy when some of your allies gets destroyed by mobs or a boss.
Coral Riptide (Medium)

Coral Riptide is a mainly damage-focused armor set. It starts making you stronger right off with its 2-piece bonus that gives you a pure critical chance increase (up to 657 depending on the RNG). The 3-item effect increases your damage against mobs in instanced zones by 5% – that's the Minor Slayer buff that you might be familiar with already. Get one more item and you'll activate the 4-piece bonus that gives you a flat damage upgrade. That's up to +129 weapon or spell damage, depending on your primary stat. The perfected version of the set will also award you with extra crit improvement for gathering 5 items. So, as you see, you become a way more threatening damage machine: your crit and damage grow significantly.
Now let's see what the ultimate bonus for this set is. It's activated when you collect 5 pieces. You get more damage (weapon or spell damage) when your stamina is not full. To be more precise, you get up to 740 bonus damage for up to 33% of total stamina. Simply put, if you have 33% of your max stamina, you get 740 extra weapon/spell damage. What does it mean? This set encourages you to cast stamina-based spells and do blocks and dodges as often as possible. It rewards you for doing so by making your damage higher while your stamina is restoring. This bonus might be not as team-useful as that of the Pearlescent Ward but it's still a very good one. After all, does your team not benefit from your damage contribution during a boss fight? It does, so this set will make your contribution even bigger!
Whorl of the Depths (Light DPS)
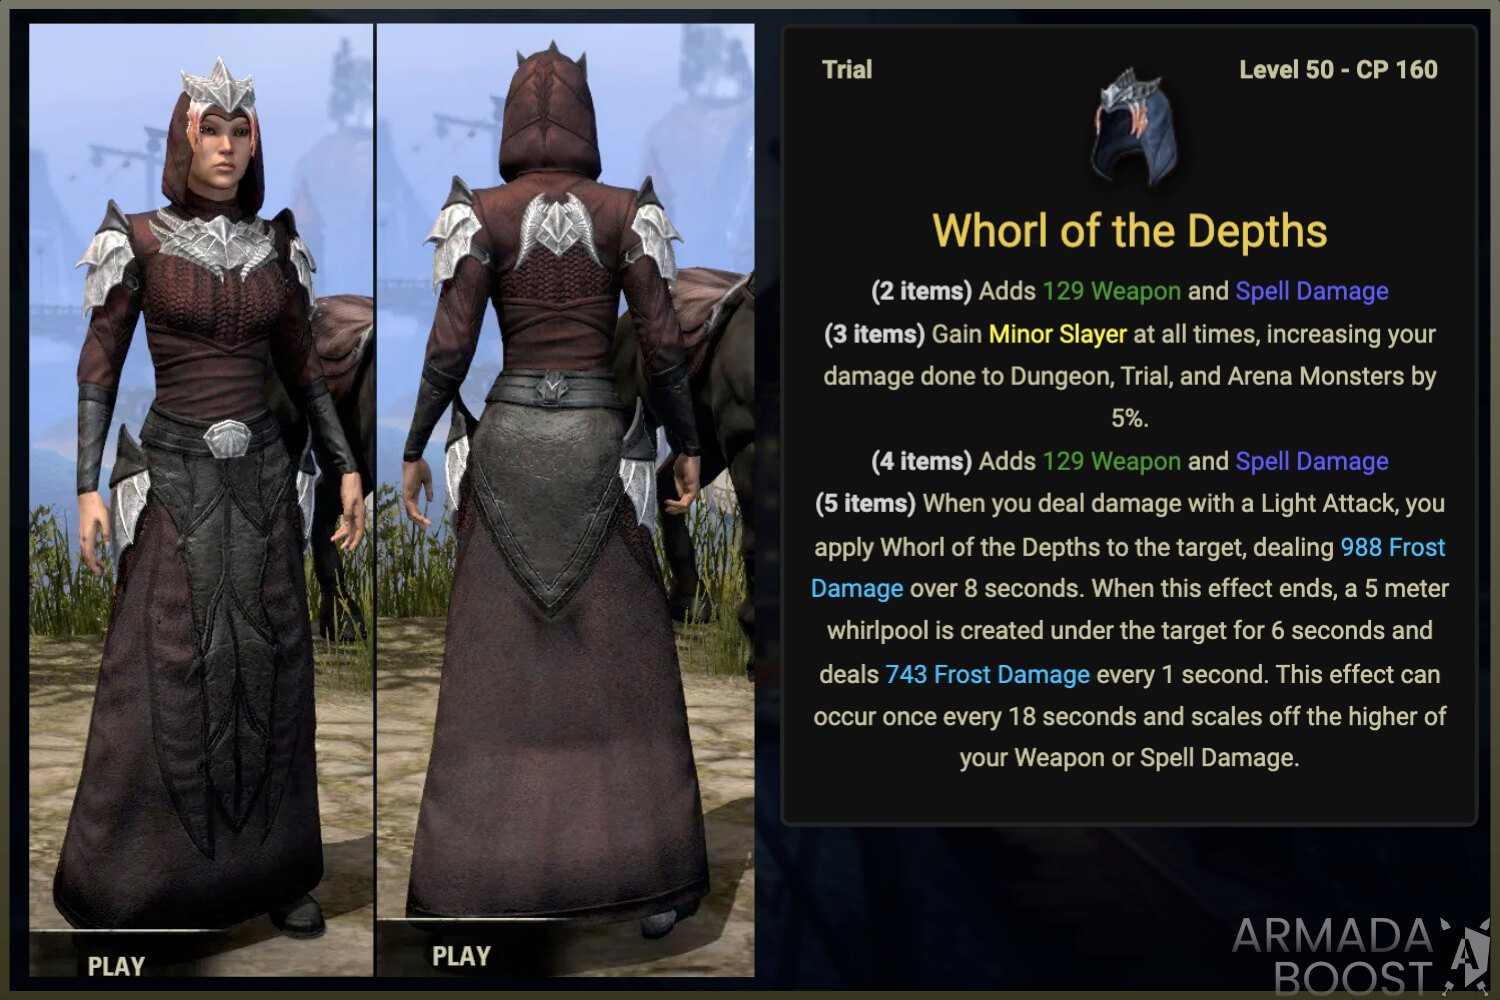
Whorl of the Depths is perfect for DPS casters and other damage-focused champions who wear light armor. Its bonuses are pretty straightforward in that regard: you get a plain damage bonus for both 2 and 4 pieces of the set collected. It can be either weapon damage, or spell damage, depending on which is more important to you. 3 collected items get you the Minor Slayer passive buff which increases your damage by 5% against hostile NPCs in PvE activities (trials, arenas, dungeons). The perfected version of the set also adds up to 657 to your crit chance. So as you see, it's all about damage.
Now let's see what the ultimate bonus does. It's activated after gathering 5 items of the set. With it your light attacks apply a DOT on the target and after it ends, there appears an AOE damaging zone under the target. So it's damage, damage, and damage again. This armor set is absolutely consistent with its mission! Let's learn how those effects work exactly: your light attacks now apply the effect "Whorl of the Depths". It deals frost damage (up to 988) to your target over 8 seconds. After it expires, a whirlpool appears under the target: it's 5 meters wide, it deals 743 damage every second, and lasts 6 seconds in total. Your weapon or spell damage stat can increase the amount of damage all those things do – the higher of them affects it most. So all in all, it's a great damage-boosting set for anyone who's into light armor.
Pillager's Profit (Light Support)
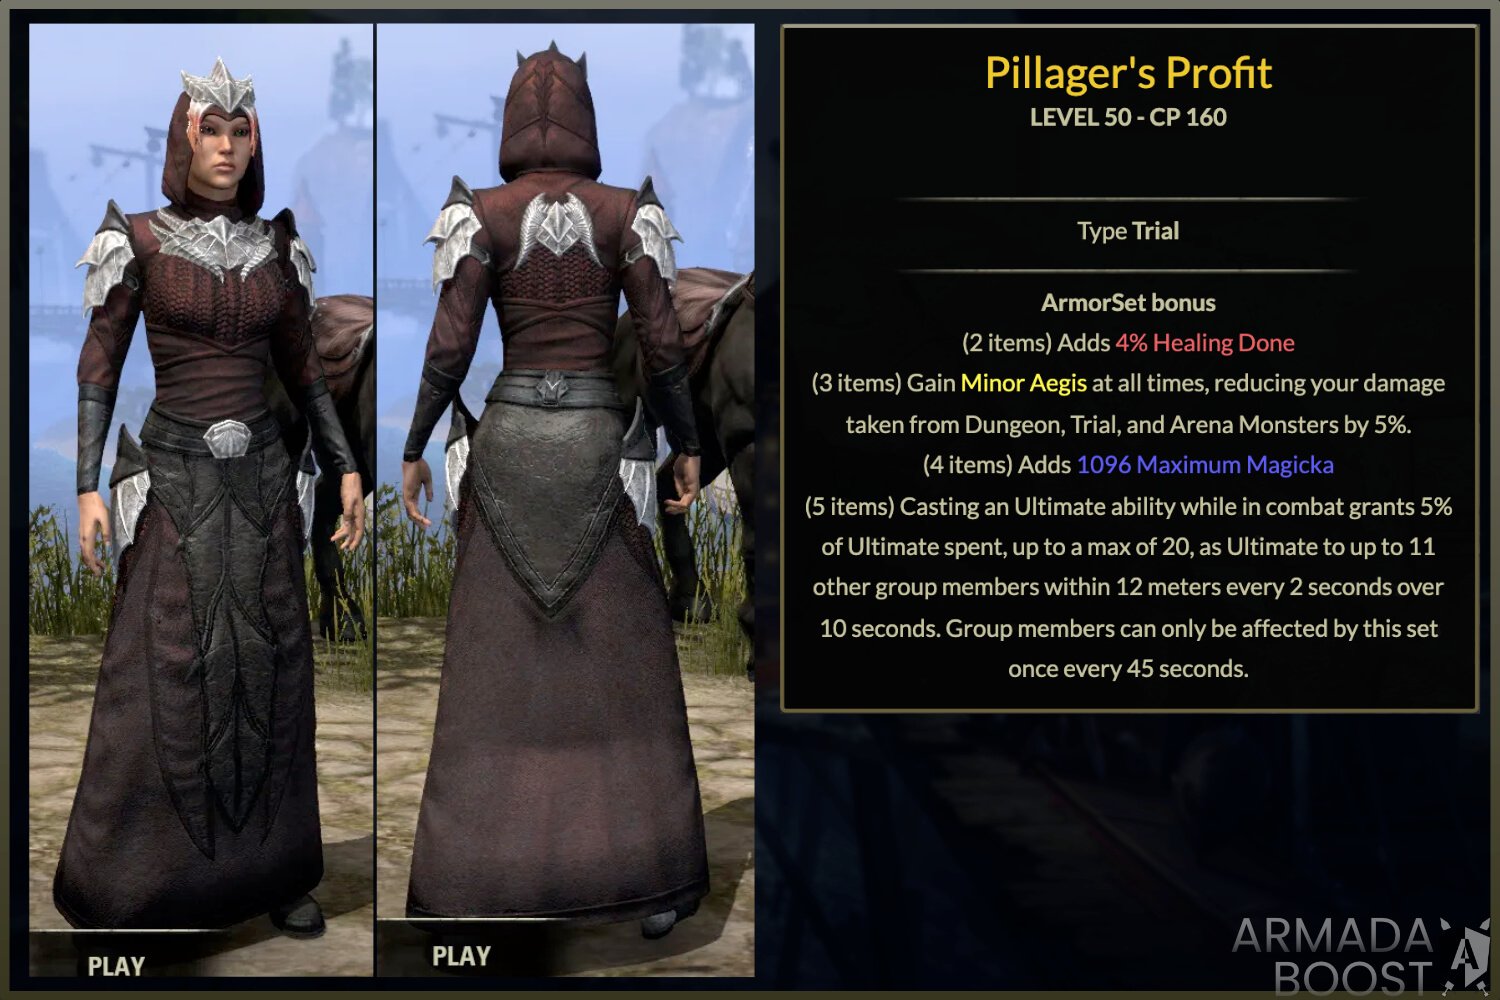
Pillager's Profit is the support's light set and it offers a lot of utility to those who choose to wear it. Its 2-piece bonus plainly increases the healing you do by 4%. The 3-item effect makes your champion more resilient with the Minor Aegis buff that decreases monsters' damage in PvE instances by 5%. The 4-item bonus gets you up to 1096 additional magicka. And the exclusive perfected 5-item effect improves your magicka restoration by up to 129. So the picture is as follows: you heal better, restore magicka faster to heal more, and you also have to heal yourself less since you take less damage. So far so good. What about the ultimate bonus?
The ultimate bonus focuses on Ultimate abilities. You restore 5% of the resource spent on your ultimate abilities to your teammates (up to 11) after casting an ultimate. The maximum ultimate resource restored is 20. And that's not total: they get as much every 2 seconds over 10 seconds. So that's up to 200 of that. The only trick is that your teammates have to be within 12 meters from you to enjoy this bonus and they can only do so once every 45 seconds. All in all, it's a great bonus for the team since it lets its members use their ultimate spells more often which results in more damage within the same period of time.
***
As you can see, these sets are great. They might be not exactly game-changing but they are certainly a most welcome addition to any collection. If you feel like getting one (or several?) but have no experienced team to run vDSR to farm it, don't worry! You can always request some help from professionals. You have us, for instance: we have a dedicated Dreadsail Reef carry service. Check it out in the ESO trial section by clicking the button below! Or just get in touch with us to learn more or order the boost right in the chat!


 Success

 Data
updated
Data
updated